ChatGPT Settings 101: A Must-Have Guide for Everyone

Navigating ChatGPT's settings is pivotal to tailor your user experience. While often overlooked, these configurations can profoundly influence the platform's responsiveness and relevance to your needs. This guide offers a concise overview, illuminating the significance of each setting. Whether enhancing personal preferences or achieving more effective responses, this article is an invaluable roadmap to optimizing your ChatGPT journey.
ChatGPT Layout
Sidebar
Chat History: The sidebar shows your past conversations, organized by day—today, yesterday, a week ago, and even up to 30 days back. Conversations older than a month will be labeled by their respective months.
Visibility: Use the Sidebar button to reveal or hide your screen's sidebar.
Starting Fresh: Click "New Chat" to initiate a new conversation.
Settings: access it via the three dots near your account name.

Open Sidebar
Click the Sidebar icon to close or open it.

Edit Chat Name or Delete It
Modify or Remove a Chat
Find the Chat: Look for the specific conversation you want to remove in the sidebar.
Rename: Click the pencil symbol to change the Chat Name.

Deletion Process: Click the trash can icon. A pop-up window asking "Delete chat?" will appear. Confirm by clicking "Delete."
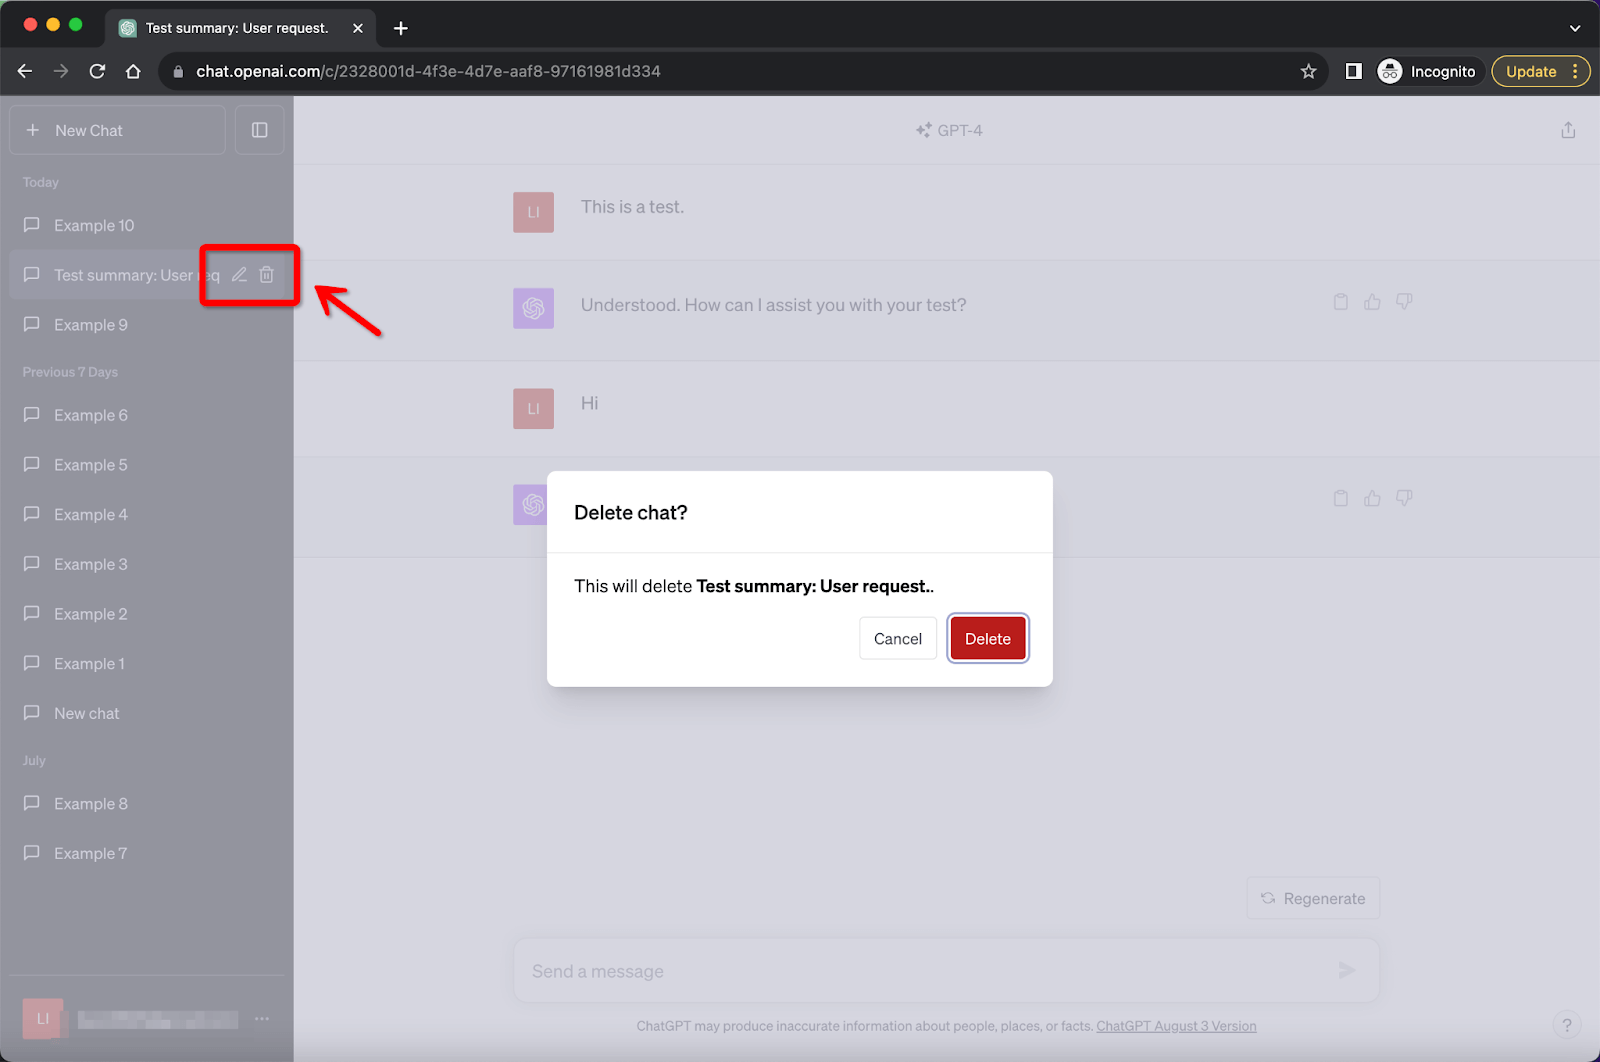
Warnings:
Permanent Removal: Be aware that doing this will thoroughly remove the chat from your end. Make sure you no longer need the chat before deleting it.
Shared Link: While the action will disable any shared link, it won't remove the chat from the history of others who have accessed it using that link.
New Chat
How to Initiate:
Select a Model: On the right-hand side of the interface, you can choose GPT-3.5 or ChatGPT-4.
Open a Conversation: Click "+New Chat" in the sidebar to initiate a new chat.
It's important to note that you can only select one model for each chat and not switch models once the chat has started. You must create a new conversation if you wish to change the model.
Begin Chatting: After you've made your selection, you're ready to start chatting with ChatGPT.

There are unique Modes for GPT-4:
Default Mode: Standard chat interface.
Browse with Bing: Enables browsing features for your chat.
Advanced Data Analysis: Allows data analysis and code interpretation. This is only valid for the current session.
Plugins: Enables third-party plugins to enhance the chat functionality.
Pictures: You can attach picture in the GPT-4 model.
How to Enable Modes:
Select the mode you wish to use.
Click "+New Chat" to activate it for your new conversation.

Points to Note:
Single Mode: You can only select one special mode and not switch it during the chat.
Sequence Matters: You must select the function before clicking "+New Chat," or else these unique modes won't be activated.
Plugin Limit: A maximum of three plugins can be selected simultaneously.
Advanced Data Analysis is only valid within the ongoing session and will deactivate once you leave.
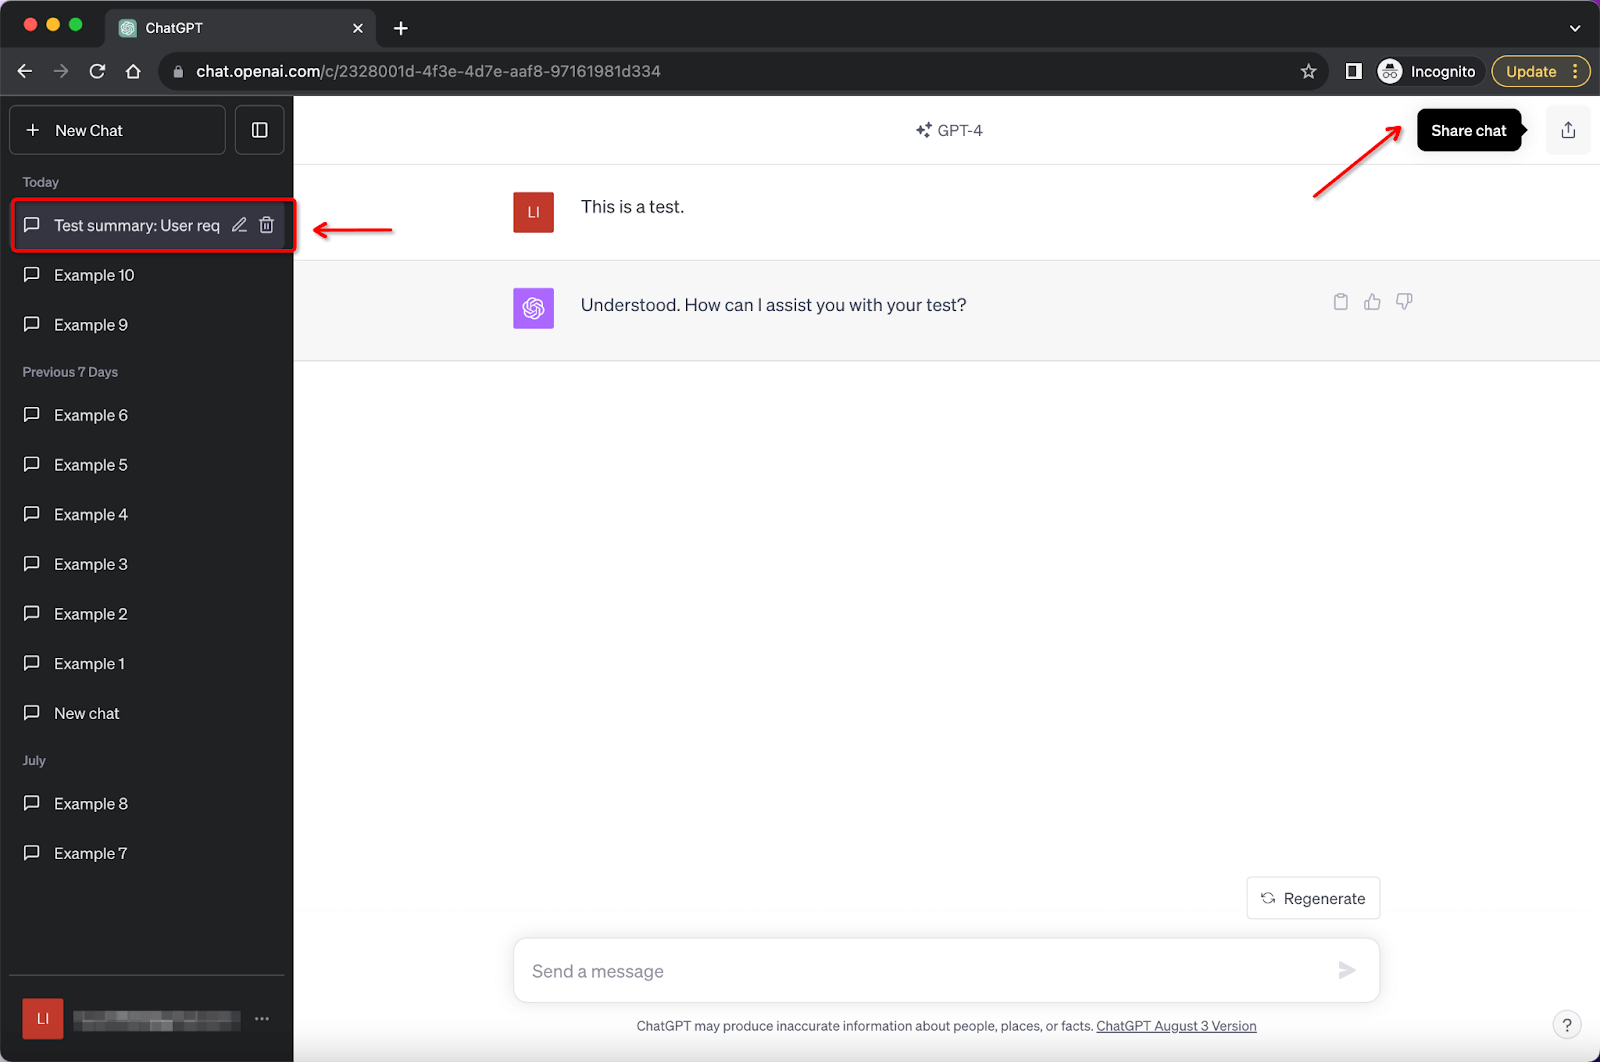
Share Chat
You can share your chat with others with a unique link.
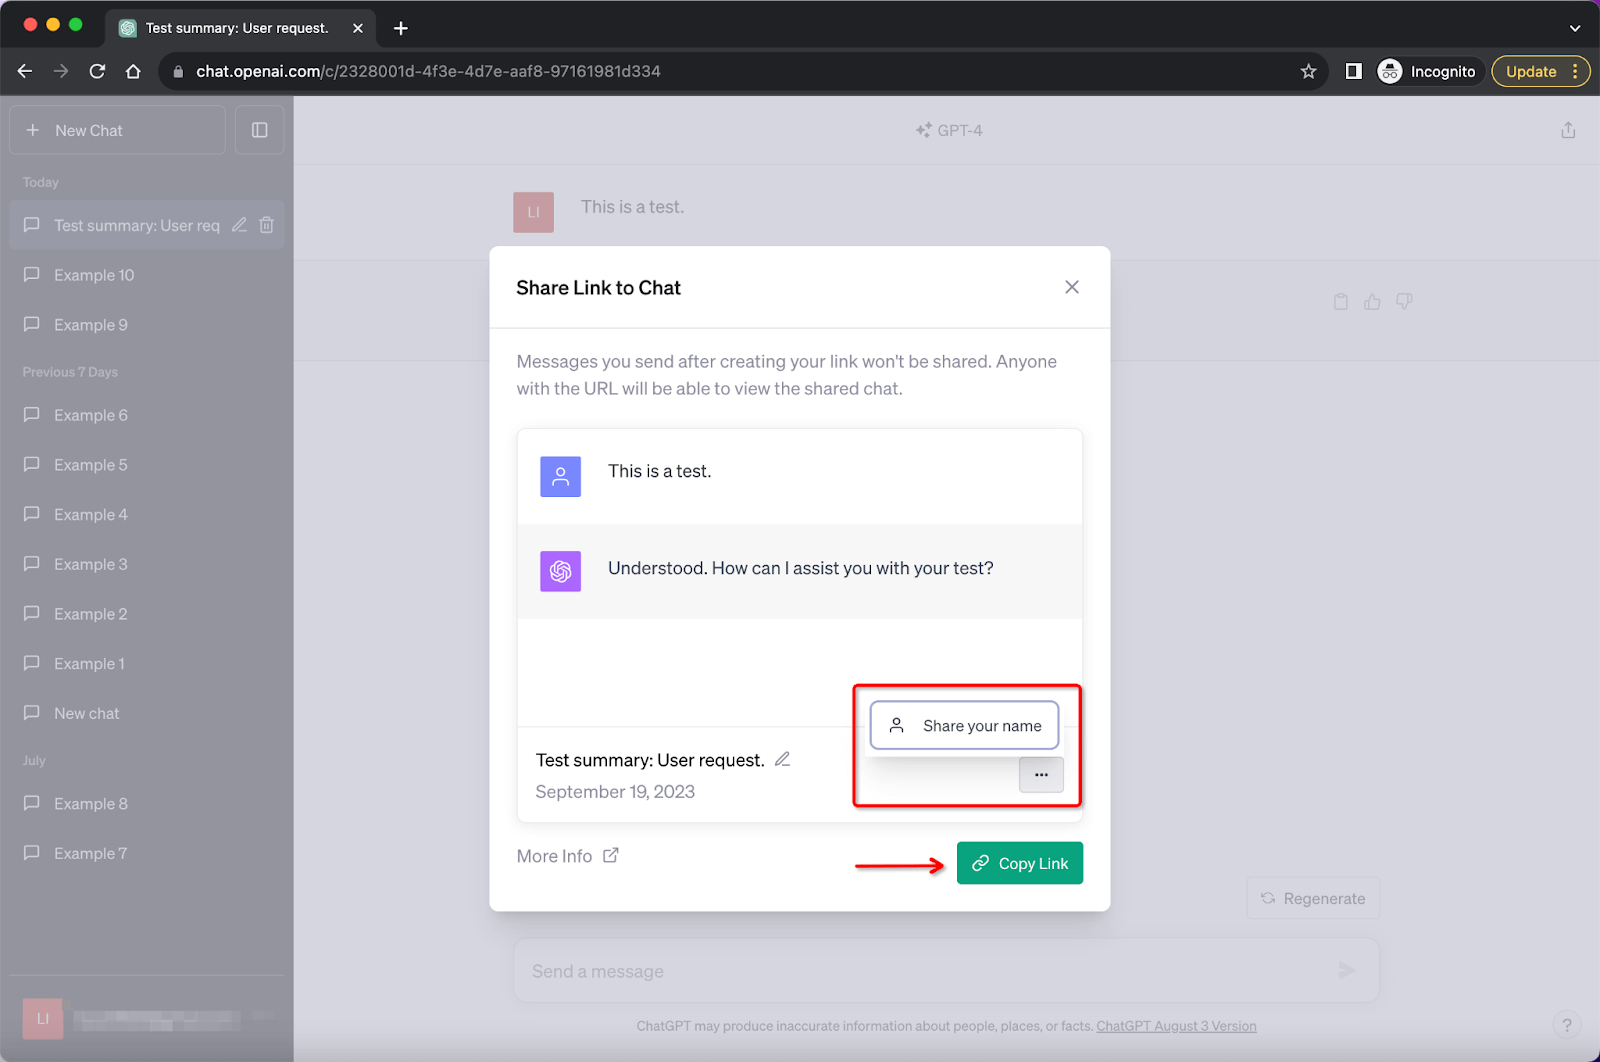
Select the conversation you wish to distribute. Tap the "Share chat" symbol located in the top-left corner.
Verify the chat details. Review the preview for accuracy. Press the "Copy Link" option to generate a distinct link for the dialogue. Disseminate the link effortlessly through email, messaging, or any other preferred communication method by pasting it.
ChatGPT Settings: My Plan
The My Plan feature allows you to oversee your subscription settings, from updating payment methods to canceling your plan. Here's how to navigate through it:
Locate Account Information: Find the three dots next to your account name in the lower-left corner of the screen.
Access My Plan: Click "My Plan" to open the subscription management page.
Free Users:
If you're using the free version, you will receive a prompt suggesting you upgrade to the Plus plan. Click “Upgrade to Plus” to use the Plus version.

View Current Plan: Your current plan will be displayed if you're on the Plus version.
You have the option to Manage my subscription, which encompasses:
CURRENT PLAN: See the specifics of your existing plan.
View Details: Acquire additional details about your subscription.
Your Plan Renews On: Learn the date when your subscription will renew.
Cancel Plan: Terminate your current subscription.
You can also Manage Payment Methods to either add new or remove existing payment methods.
BILLING INFORMATION: Update your billing details.
INVOICE HISTORY: Review your invoice history.

Alternatively, if you encounter any billing-related issues, clicking on I need help with a billing issue will direct you to the OpenAI Help Center page.

ChatGPT Settings: Custom Instructions
What Is It?
Custom Instructions is a feature that allows you to fine-tune your interactions with ChatGPT by setting specific preferences or guidelines. These instructions help ChatGPT understand how you want your chat experience to be, making your interactions more personalized and efficient. The feature is available for both Free and Plus users.
Why Use It?
The benefit of this feature is that it reduces repetitive communication. For example, instead of specifying your preferences every time you interact with ChatGPT, you can set them once.
How to Set It Up
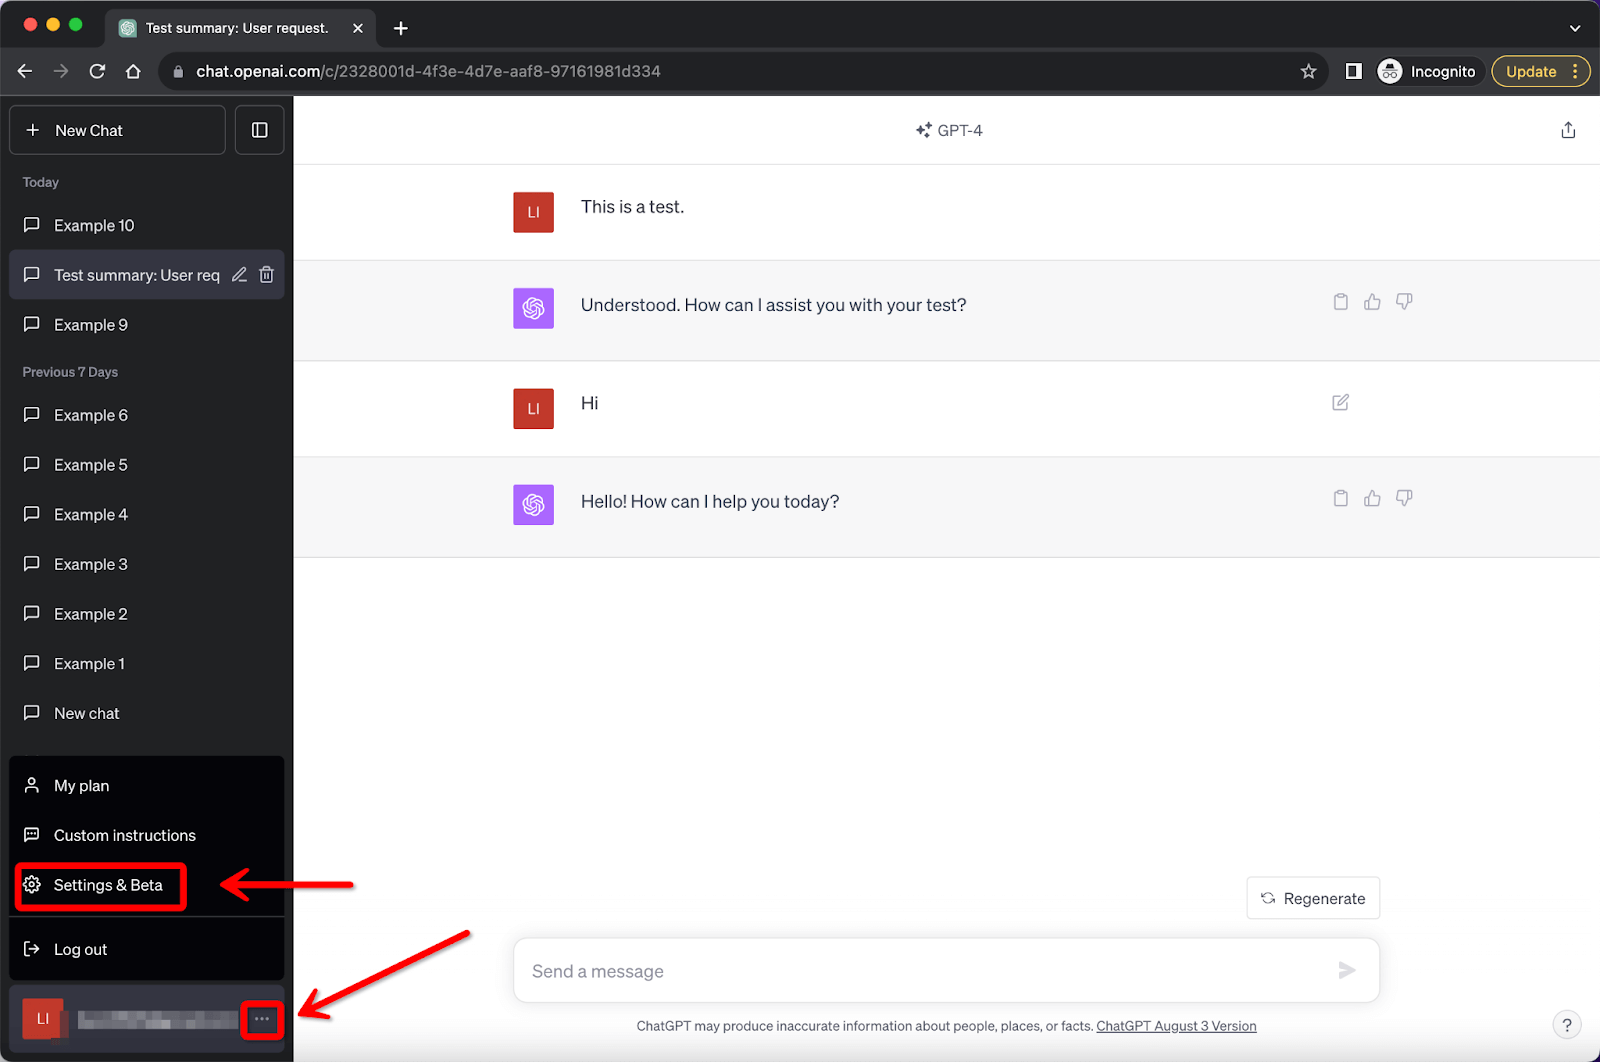
Locate the Menu: Find the three-dot icon next to your account name and click on it. A dropdown menu will appear where you should select "Settings and Beta".
Activate the Feature: In the "Settings and Beta" section, look for the "Custom Instructions" option. Toggle the button next to it to activate this feature.
Specify Instructions: Click the three-dot icon again and select "Custom Instructions". This is where you can lay out your preferences and guidelines for ChatGPT. Be as specific as you like to get the responses you desire.

Get Suggestions: If you need help phrase your instructions, hover your mouse over the input box. ChatGPT will offer suggestions to help you articulate your preferences.
Apply to Chats: Once you've created your custom instructions, you can apply these to all new chats or only specific ones.

Note: If you've already enabled Custom Instructions, you can revisit and edit them via the settings outlined in Step 3. There's no option to turn off this feature entirely now, but you can choose not to apply it to new chats.
ChatGPT Settings: Log out
Click the three dots next to your account name in the lower left corner.
Click "Log out" to log out of your account.
Note: There is no confirmation pop-up window for this step. Once you click it, ChatGPT will close immediately.

Conversation
Send Prompt
Type your prompt and click the icon to send. If unsure what to ask on your first try, consider using ChatGPT's suggested prompts as a starting point.

When you initiate a conversation with ChatGPT, various actions can be taken based on its responses.
Stop generating
If you spot an error in your prompt or feel ChatGPT's response isn't helpful, click the 'stop generation' icon to halt it.

Edit Prompt
You can edit the prompt you send.
Locate the prompt you wish to edit. Click the pen icon on its right side.

Make your changes. Choose "Save&Submit" to update. ChatGPT will immediately respond according to your edited prompt. Alternatively, select "Cancel" to discard changes.

Note:
You can’t submit a new prompt while ChatGPT is responding.
After editing, the chat history starts from your edited prompt. For instance, after editing the second out of 10 prompts, the chat begins from this edited one. To view original conversations after an edit, hover over the second chat's prompt and click the left (<) arrow. You can also see how many times it was edited.

Continue
If generation is interrupted or halted due to output length, send command like "Continue" for ChatGPT to resume responses.

Regenerate
If you're unsatisfied with the results, click "Regenerate" to obtain new outcomes without altering the prompts.

ChatGPT Settings & Beta:
Navigating the Settings & Beta option in ChatGPT can optimize your user experience.
How to Access Settings & Beta
Navigate to Menu: Click the three dots next to your account name to reveal a dropdown menu.
Choose Settings & Beta: Select "Settings & Beta" from the dropdown.

Once you're there, you'll find three main categories:
General
Beta Features
Data Controls

General
Set Theme:
Choose between System, Dark, and Light themes.
Steps to Enable:
Locate the current theme displayed on the right side of "Theme".
Click the down arrow next to it to reveal the options.
Click your preferred theme and it will be applied immediately.

Clear All Chats:
Erase your conversation history.
Steps to Enable:
Click the red "Clear" button.

Confirm by clicking “Confirm Deletion".

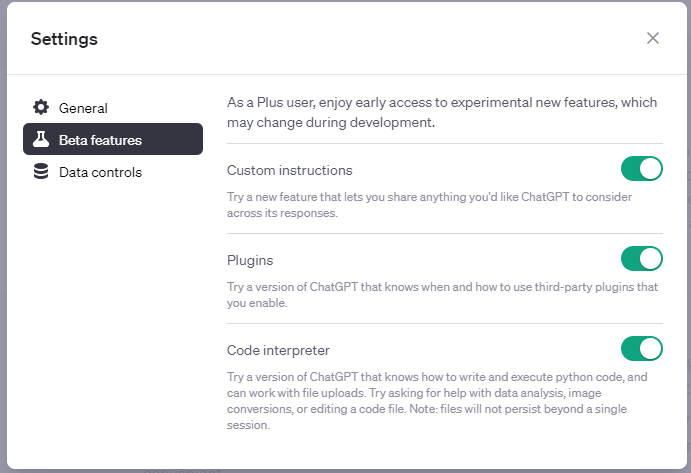
Beta Features
Note: Exclusive to ChatGPT Plus users
Features:
Browse with Bing: A version of ChatGPT that browses the internet to answer questions about recent topics and events.
Plugins: Expands ChatGPT's capabilities with third-party plugins, including networking and PDF reading.
Advanced Data Analysis: Formerly known as the Code Interpreter, this feature allows you to upload files and execute Python code.
Steps to Enable:
Locate the features you're interested in.
Click the buttons to the right of the features to turn them on.

Data Controls
Chat History & Training:
Save or delete new chats and permit them for training improvements.
Steps to Enable:
Click the button on the right to turn this feature on or off.

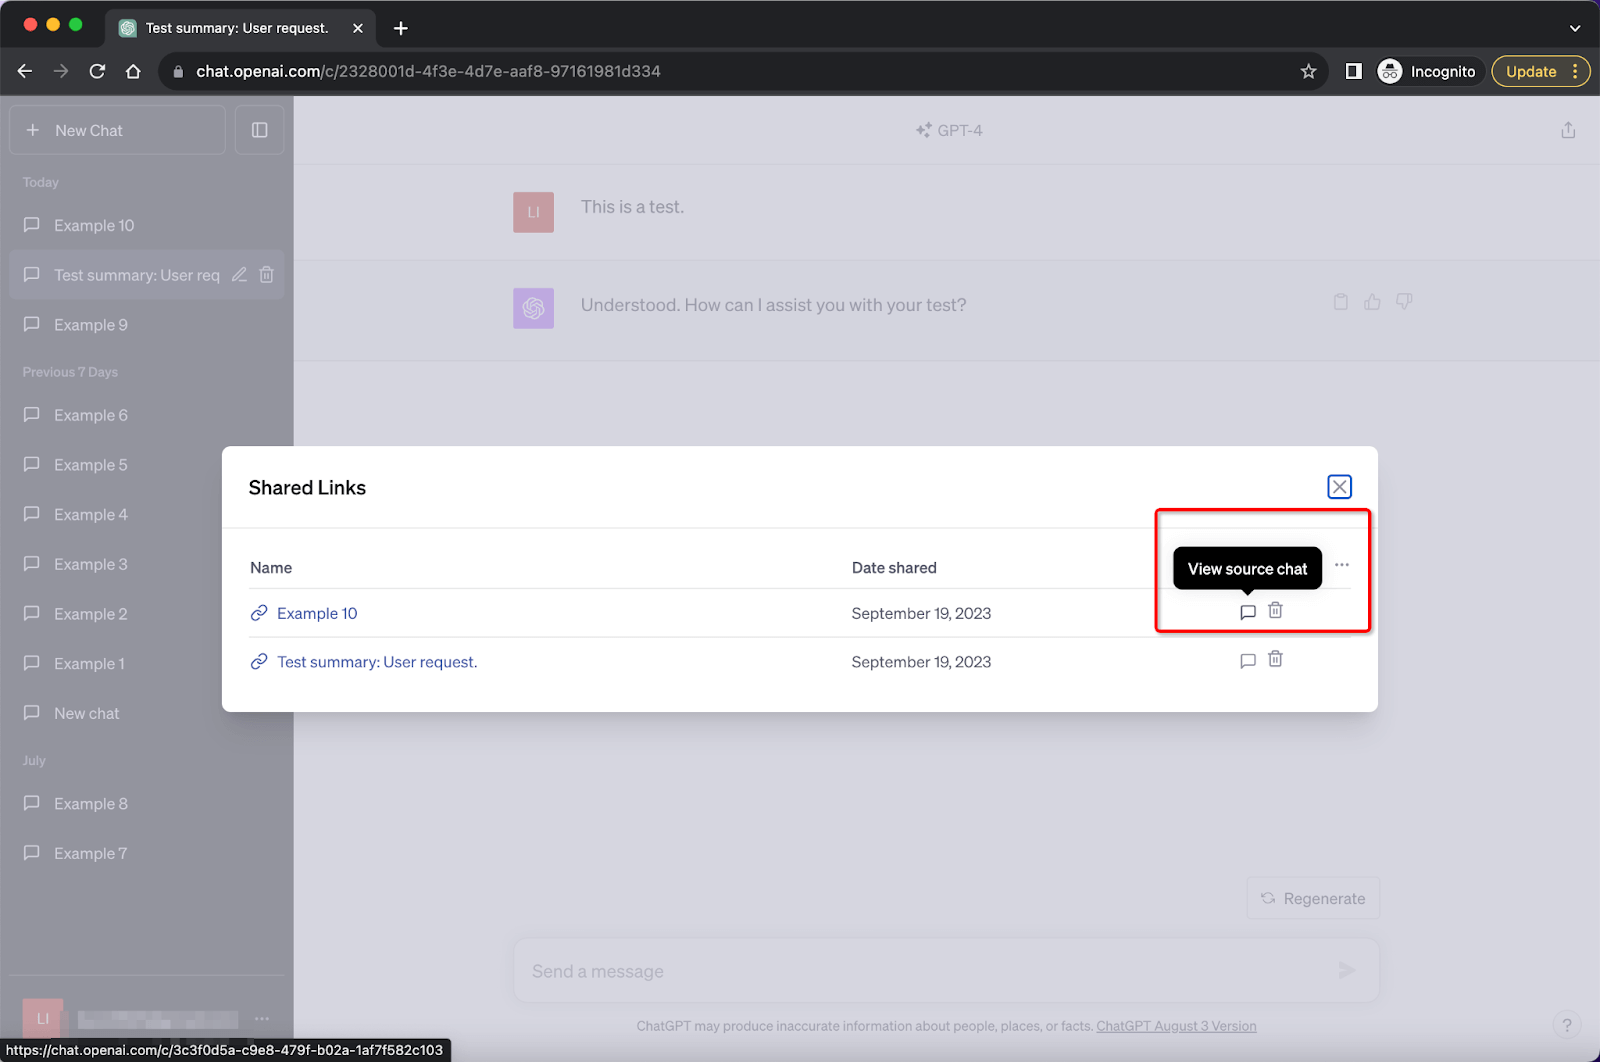
Shared Links:
Manage shared ChatGPT conversations.
Steps to Enable:
Click the "Manage" button on the right to proceed to the next step.

Then you can open a link, return to the conversation where the link is located, delete some of it, or delete all shared links at once.
Export Data:
Request an export of your account details and conversations.
Steps to Enable:
Click Export button.

Then "Confirm export" to proceed.

Delete Account:
Permanently delete your ChatGPT account.
Steps to Enable:
Click the "Delete" Button.

Follow the guidelines provided to permanently delete your account. Note: This action cannot be undone.

Notes on Deleting Your Account:
Once you delete your account, it's gone forever. You can't get it back.
You won't be able to sign up again using the same email or phone number.
All your stored information, like your profile and chat history, will be deleted entirely.
If you've been using special features through the API, you'll lose that ability, too.
You can only delete your account if you logged in during the last 10 minutes. So log in and then proceed with the deletion.
Refer a friend
What is "Refer a Friend"?
The "Refer a Friend" feature is a part of the ChatGPT Plus service, launching in September 2023. This feature allows you to share the service with your friends by providing up to three unique referral links. Each friend who uses your link will receive a free 30-day trial of ChatGPT Plus. After the trial period, the subscription price is $20 per month.
Steps to Use "Refer a Friend"
Locate the Feature: If you're a ChatGPT Plus user, you'll find the "Refer a Friend" option in the lower left corner of the ChatGPT interface.
Activate Window: Click on the feature to open a new window that says, "Share ChatGPT Plus with your friends!"

Copy the Link: You will see three links available for sharing. Click the "Copy" button next to the link you want to share. Once you copy the link, it will change from being hidden to visible and can no longer be hidden again. The "Copy" button will also change color to indicate the link has been copied.
Share the Link: Send the copied link to your friends through any medium you choose.
Friend Action: When your friends click on the link, they'll be directed to a new page to be prompted to log in or register for ChatGPT Plus.
Claim the Invitation: Once your friends log in or register, they can claim the free 30-day trial through your invitation link.

Status Update: After your friends claim the trial, the link status on your end changes from "Copy" to "Claimed", indicated in gray.
